Building My 4Runner Sleeping Platform
I chose the 4Runner for many reasons, and in part because I could take it off-road without expensive upgrades. I needed it to do more than just take me to cool places, though: I needed it to support me once I got out there, too. Because I had set my sights on the East Coast, I focused on gear to make that trip safer and more fun first, rather than new tires, bumpers, and recovery tools. As part of that process, I built a storage system and sleeping platform in my trunk. Today I want to talk about its conception, design, and construction.
Because the 4Runner and the Tacoma use the same frame, the choice comes down to whether you prefer a climate-controlled interior or an exposed bed when building a rig. I chose the former because it would take the least work to go from showroom model to adventure vehicle. I did not have the time or resources to make a Tacoma as livable as a stock 4Runner. I still wanted some of the benefits of a pickup, though, such as plenty of storage space and room to sleep on my vehicle in a pinch. I decided I could achieve those goals with a raised platform. My design had to turn the 4Runner’s trunk and second row of seats into a flat area the size of a mid-size truck bed, with storage underneath; if I had to take passengers, it had to fold back into the trunk. A setup like this would give me the best of both worlds: the livability of an SUV with the capability of a truck, at much less than the price of building out some sort of camper shell.
Design Criteria #
Once I decided to build some sort of platform, I started spelling out my design criteria. First, it had to turn the trunk and second row of seats into a flat area large enough to sleep on. I still wanted to use the second row of seats, though, so it had to fold back into the trunk, too. It also had to stay as short as possible, to maximize headroom. The space beneath it would house camp gear. I also wanted to use that space for a small camp kitchen, with an area for a large cooler or portable refrigerator and a stove.
Over the next few months, I drew many versions of the platform. First on paper, then in Google SketchUp, until I felt I had something worth building. My final design consisted of two drawers in the trunk, one for storage and one for a cooler and a stove. Both would lock open and closed, in case I parked on uneven ground. Over the second row of seats, two independent folding platforms would allow me to stow the left or right side depending on whether I wanted to use the single or double seat in the second row, or both. I have included a picture of the final design below; I also have a link to the 3D model, and a brief writeup, on my Projects page.
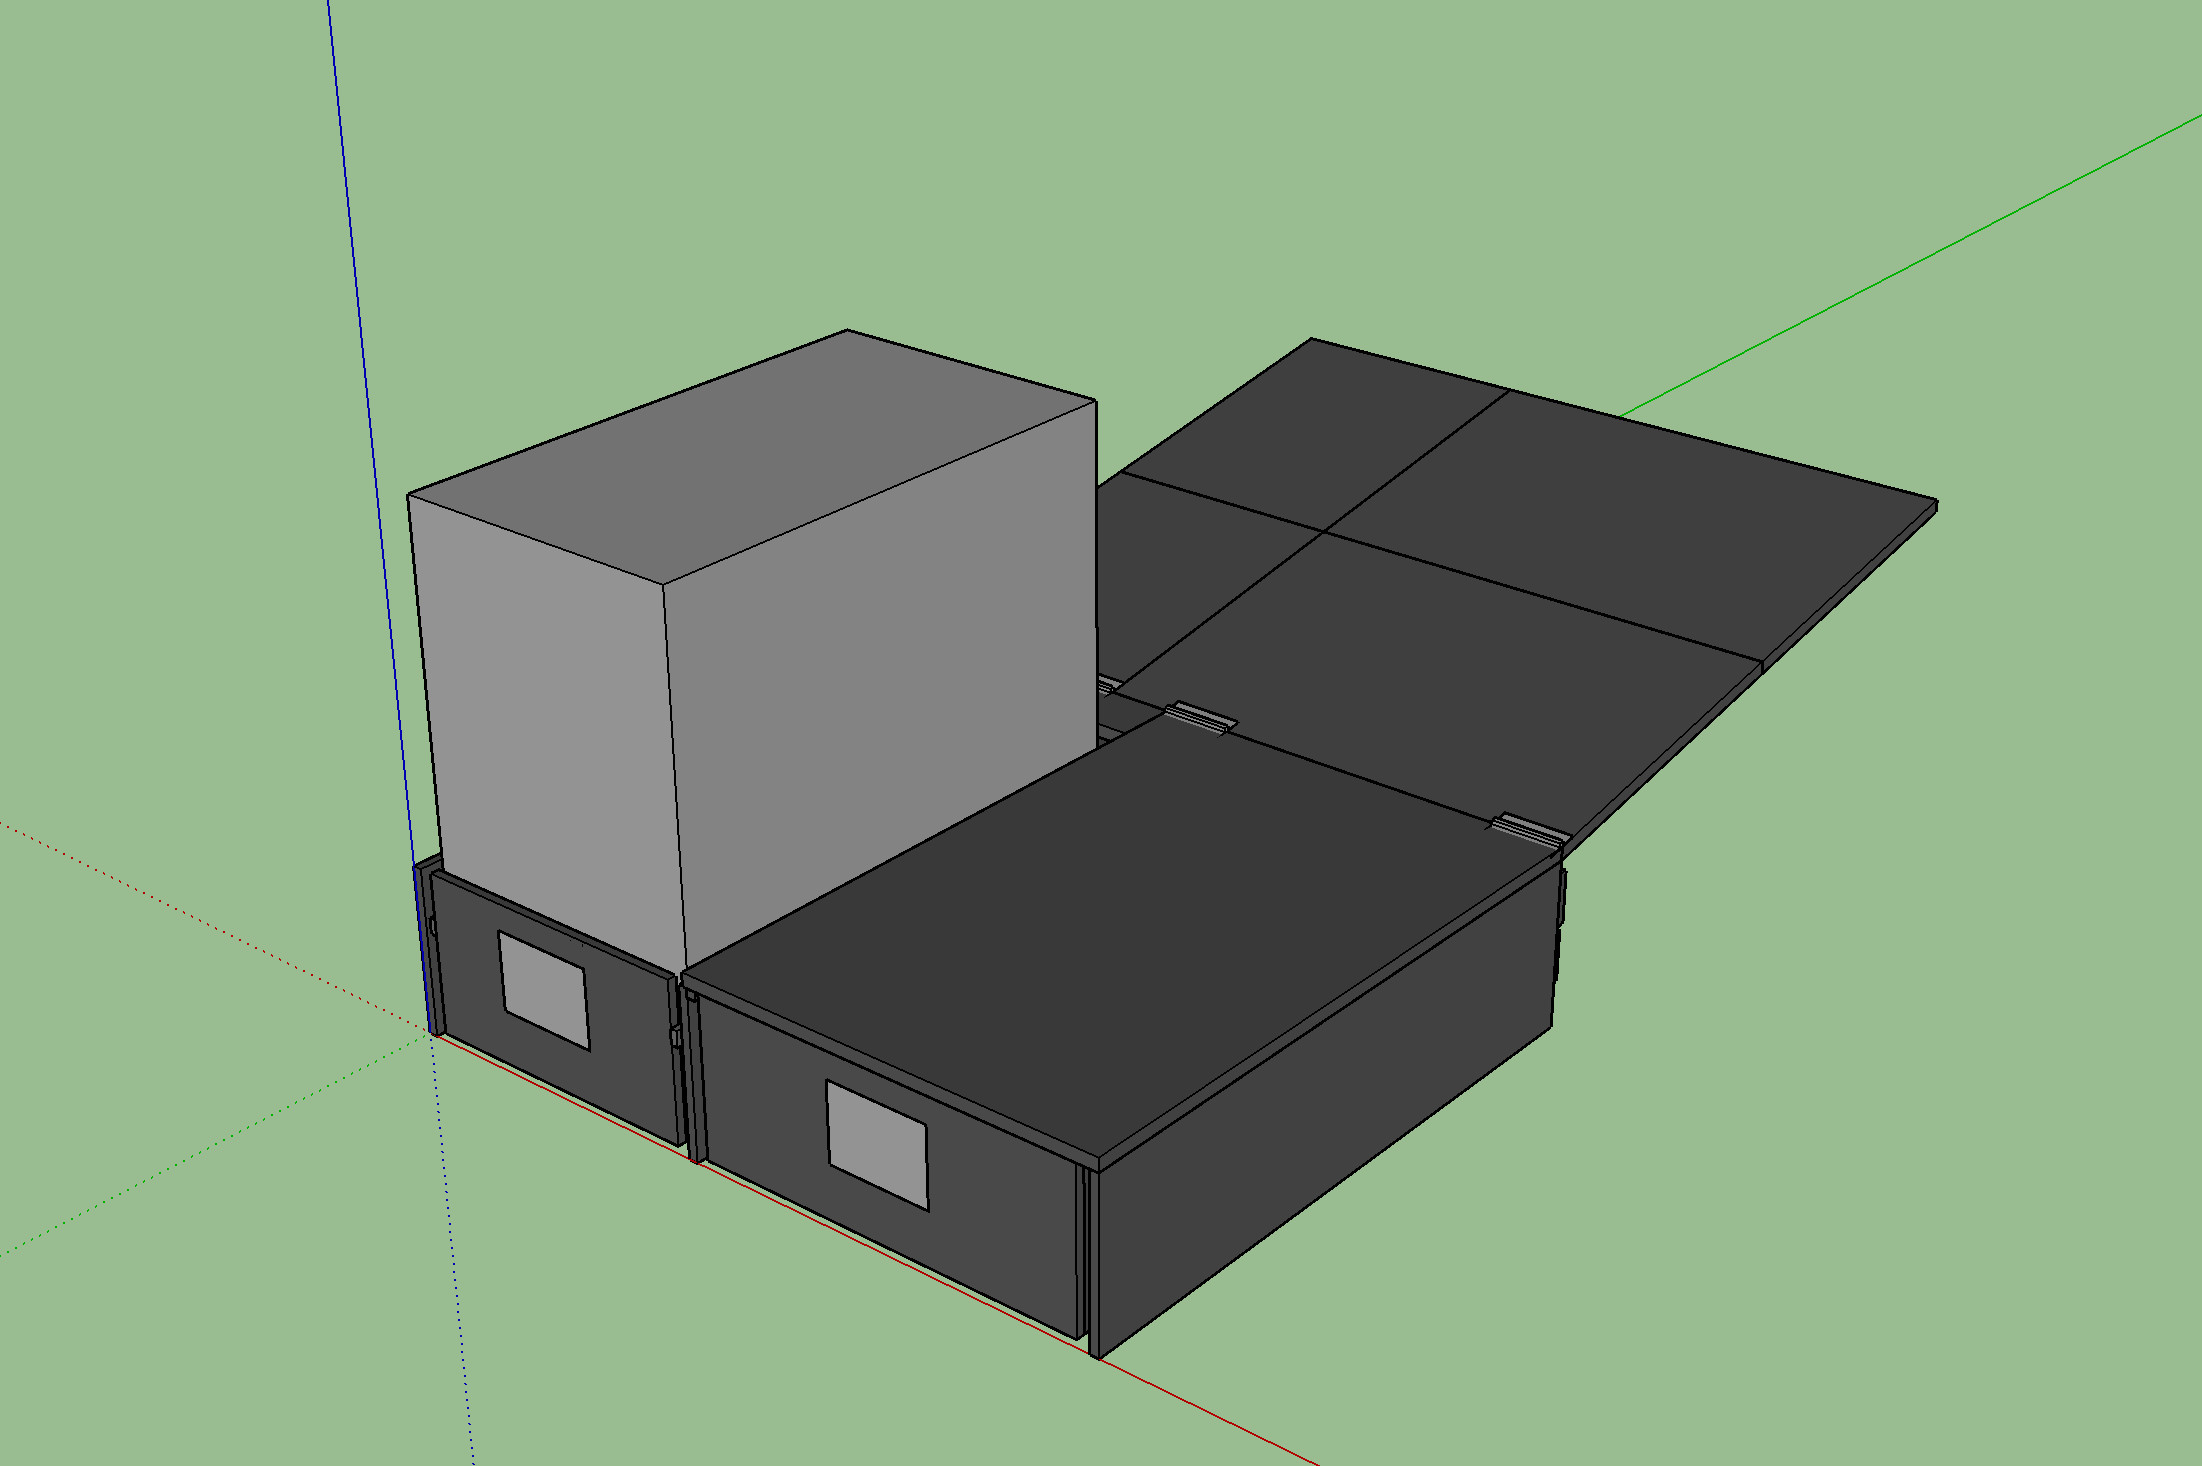
I will share more pictures of the system later. This design met all my criteria, and so I began gathering materials.
Sourcing Materials #
Although I got almost everything at the local hardware store, I want to point out that I ordered the locking drawer slides from McMaster-Carr. I can always count on great service and reasonable prices there, and they stock almost any part I can imagine. McMaster-Carr plays an important role in every project I take on, and I encourage everyone to source their parts and raw materials from them.
The Build Process #
After a trip to the hardware store, I started cutting on a Sunday afternoon. I did the entire project over the next five days and after many trips back to the store. I did not spend more than a few hours a day on it, though, so I feel confident that I could have finished it in a weekend.
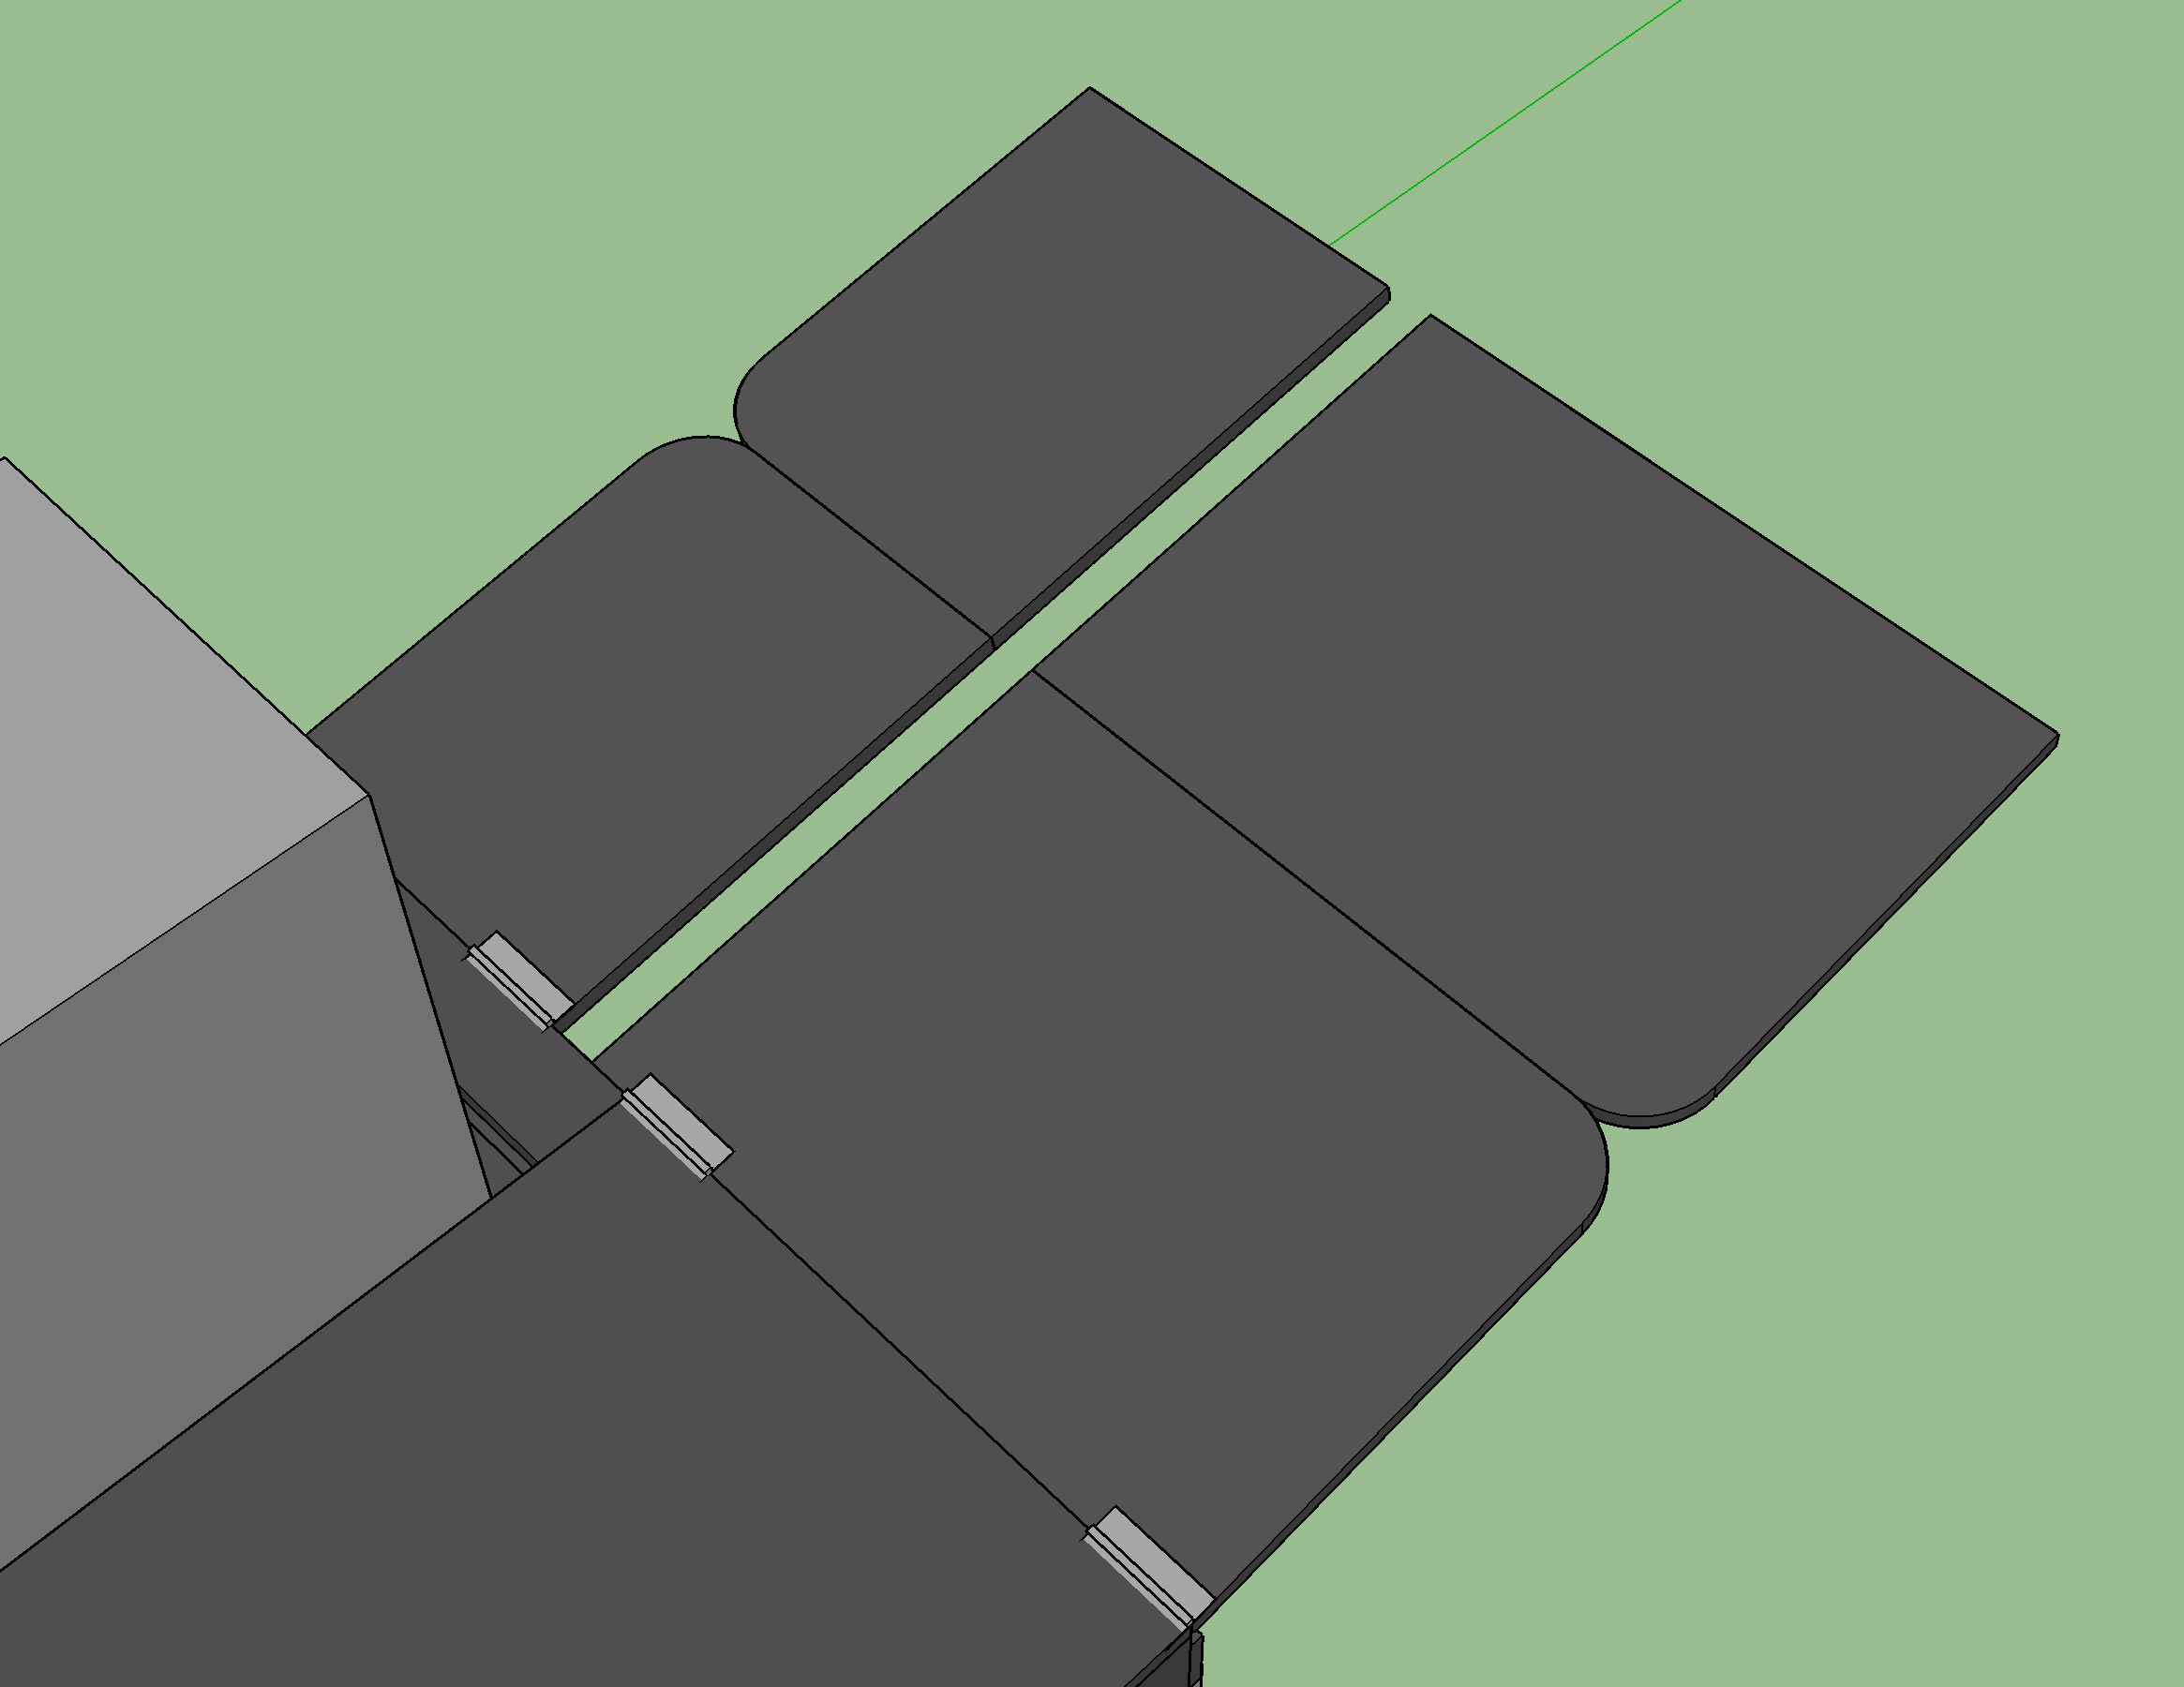
I spent a lot of time on the 3D model, so I changed little when I built it. I did have to change a couple of things, though, with the folding platform. The original design showed two square boards on each side with a hinge in the middle, that arch up and then fold back into the trunk. When folding, those middle corners collided with the A-pillar on each side. Cutting a curve into the boards before installing them would have kept a lot of sawdust out of my new car. I also had to add a small gap between the two sections, because the seat backs and their bases have different widths. This allowed me to use one platform or the other, or both, depending on the situation. I updated the model to reflect these changes, and included a picture of the new design below. Other than those simple fixes, though, I changed little.
Once I had the platform in my vehicle, I used six turnbuckles to lock it down. The 4Runner has two tie-down points behind the second row of seats, and then one next to each wheel well. These keep it from shifting, and keep it quiet on the road; most important, though, in a rollover accident I will not have a heavy wooden block bouncing around my vehicle. Below I have included several pictures of the finished product, along with comments.
The Finished Product #
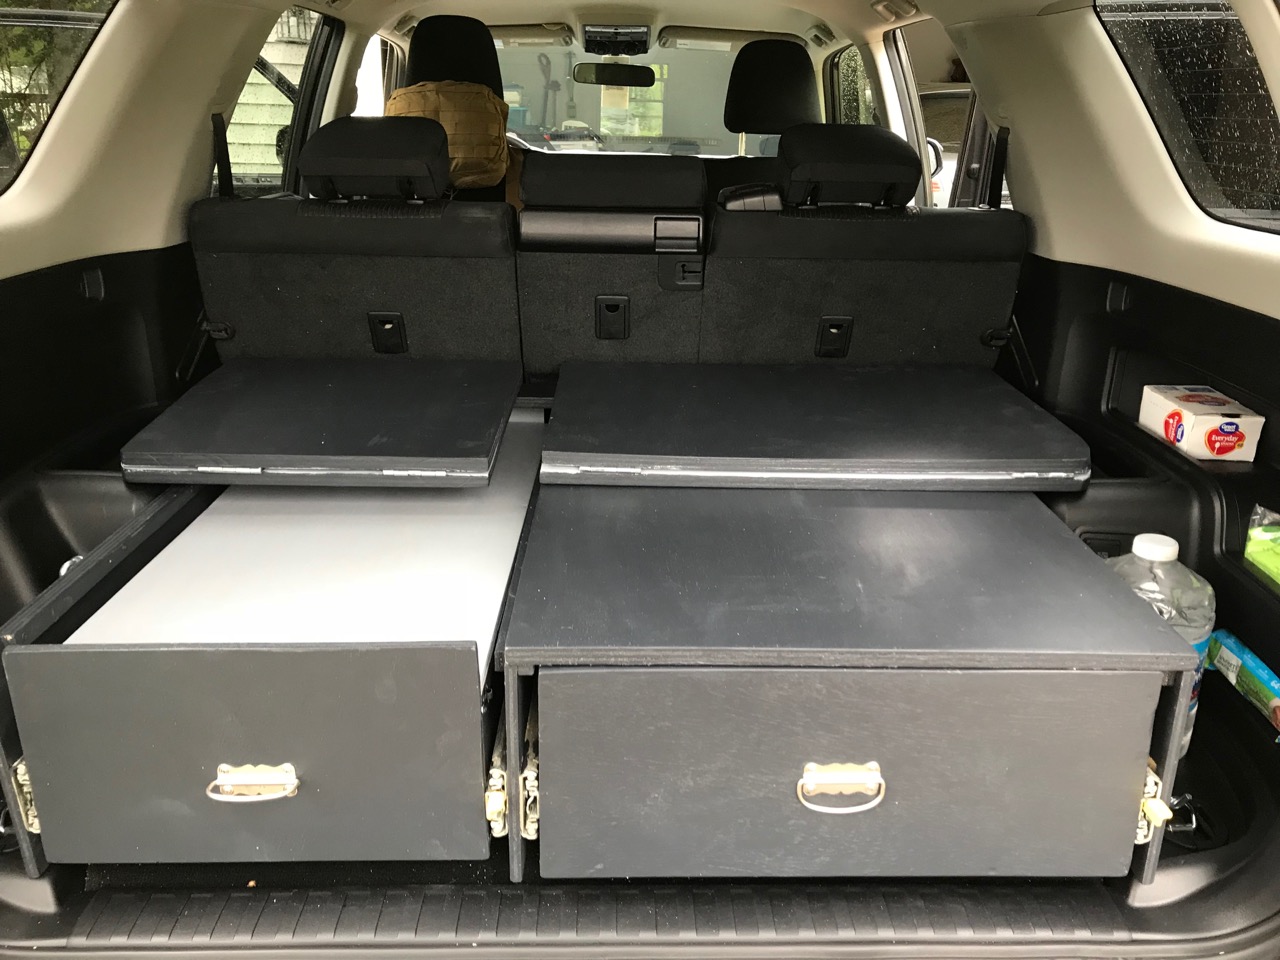
Here I have both drawers stowed, and the sleeping platform folded. Setup like this, I can use the second row of seats like normal, store gear in the trunk, and still get to the contents of the drawers if I need to. I valued the ability to return my car to “normal”, so I feel good about how this turned out.
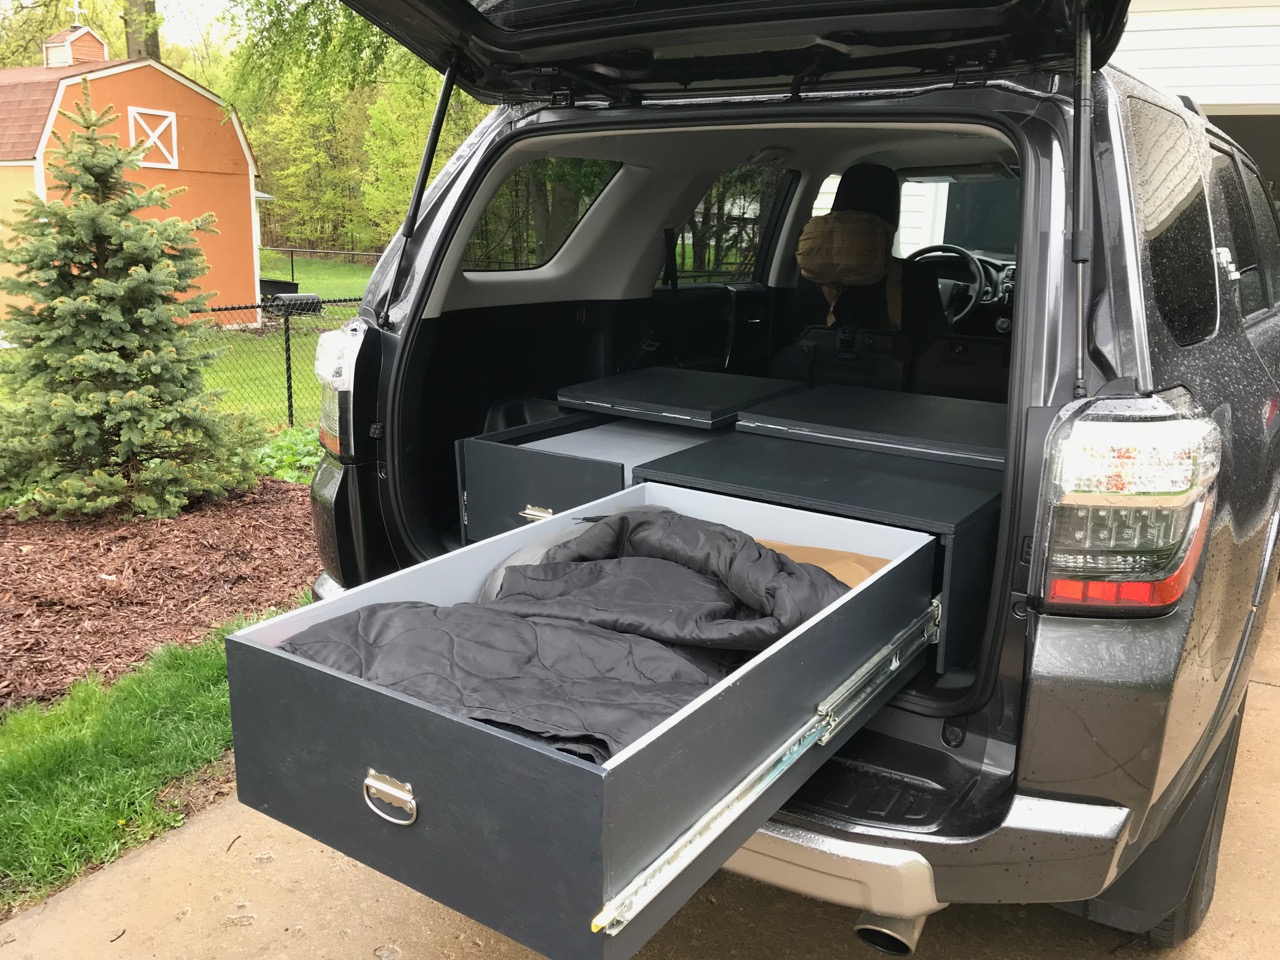
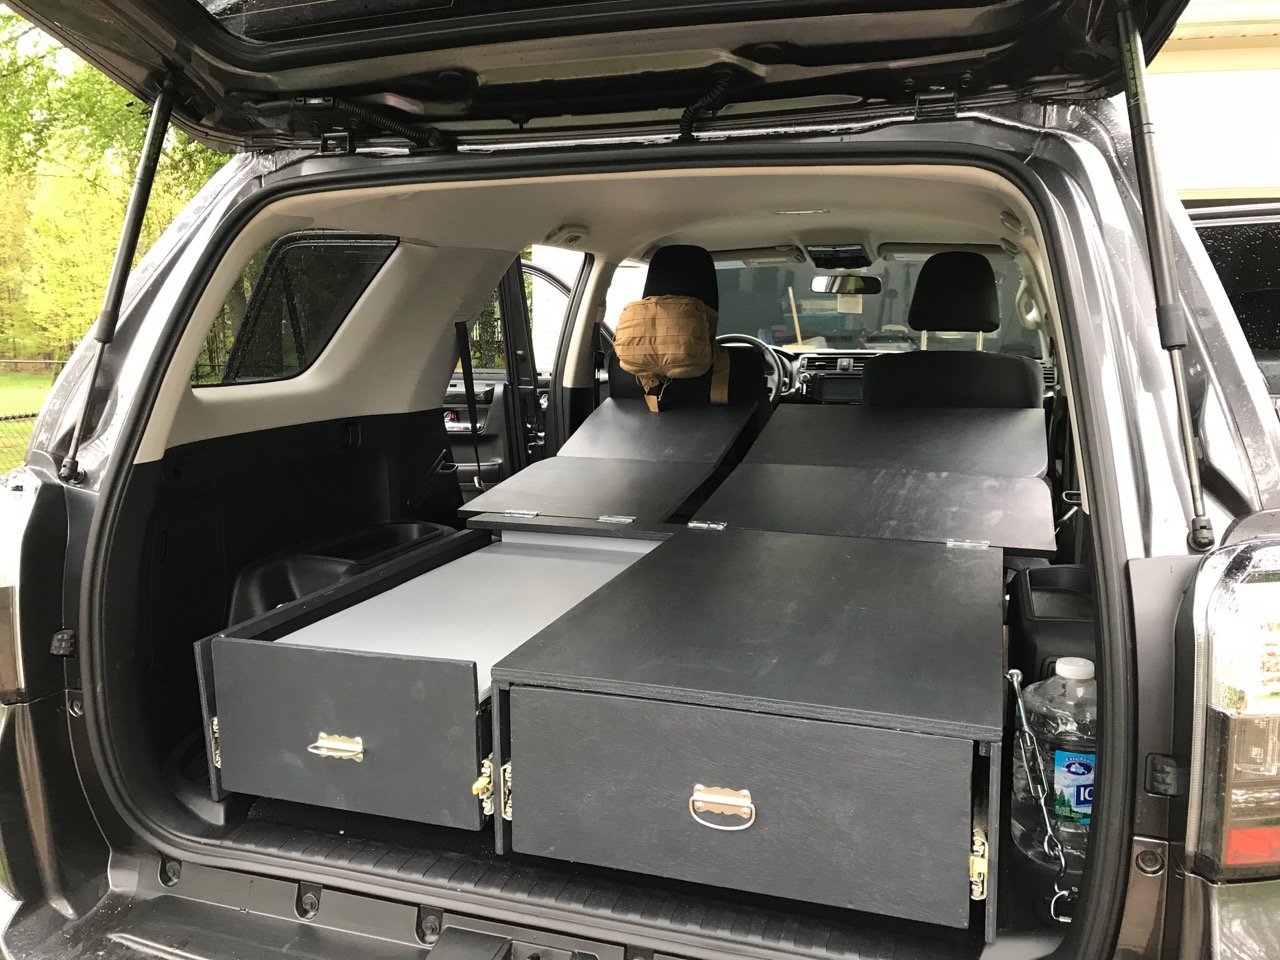
Some people like a single drawer across the entire trunk, but as I said earlier, I wanted one for storage and one for a small camp kitchen. I can open the right side while leaving everything else closed, as pictured above. I have both drawers open in the picture below, and just the left side after that.
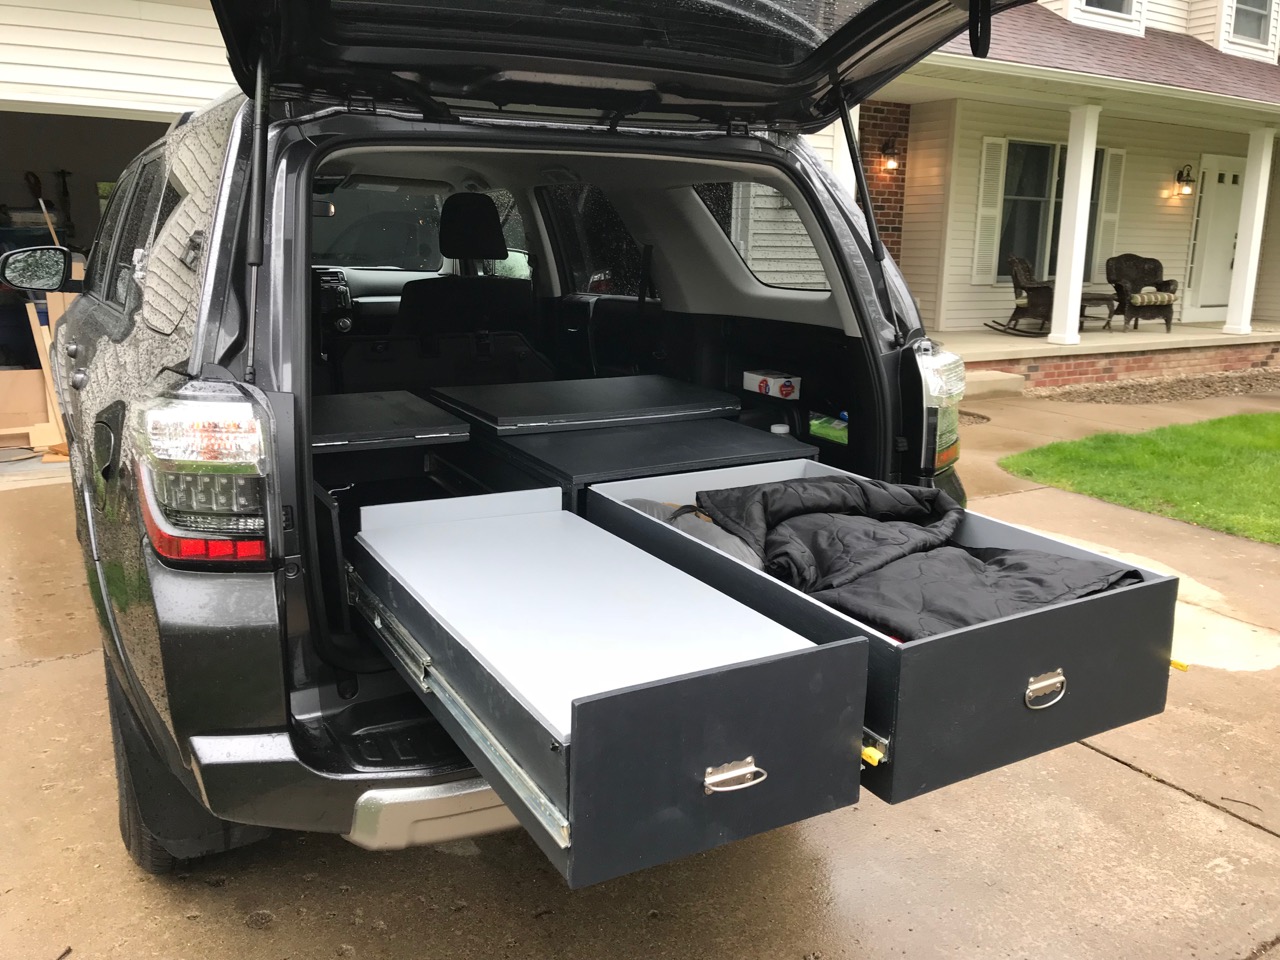
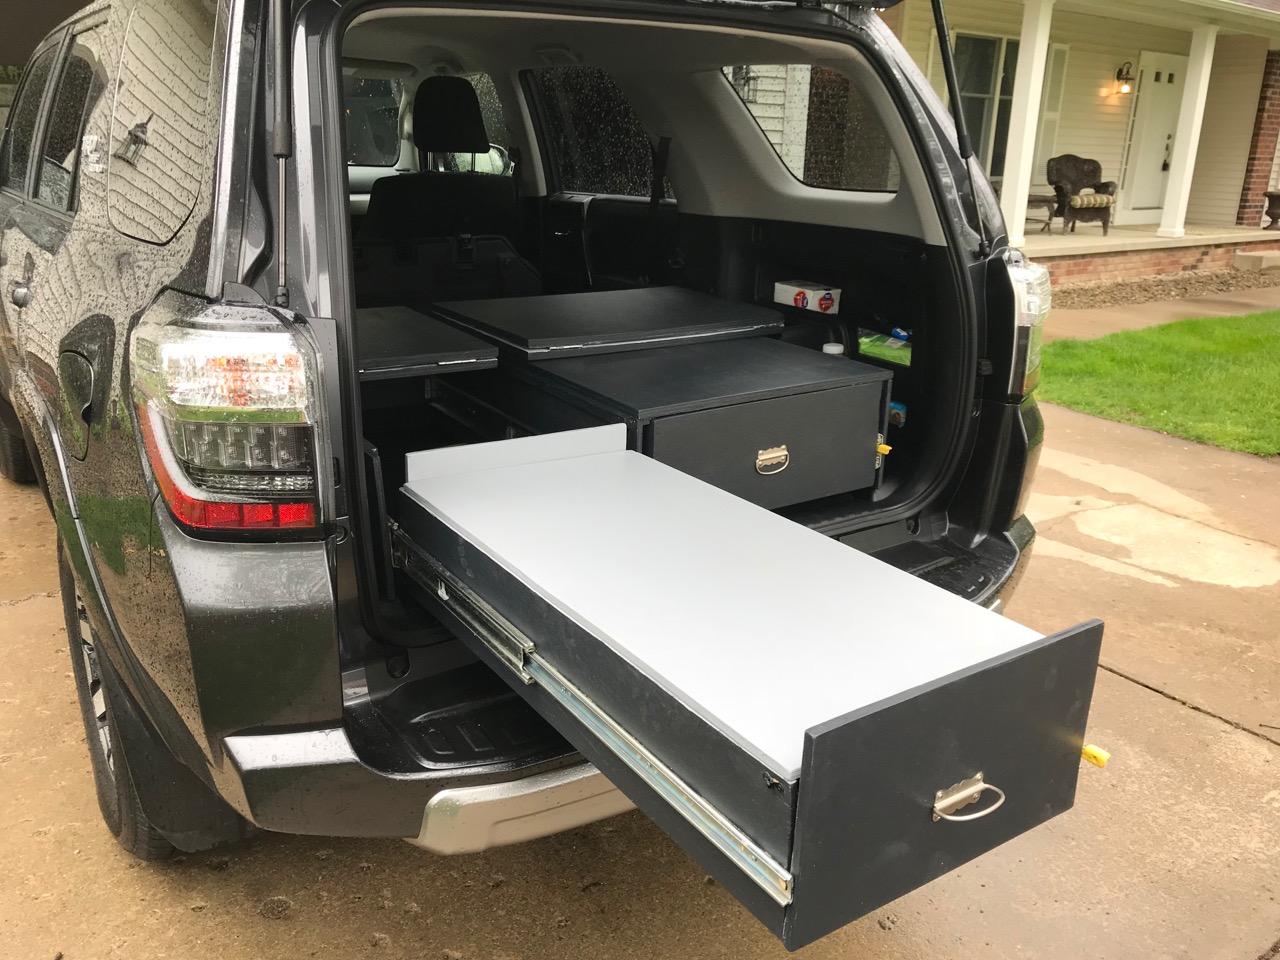
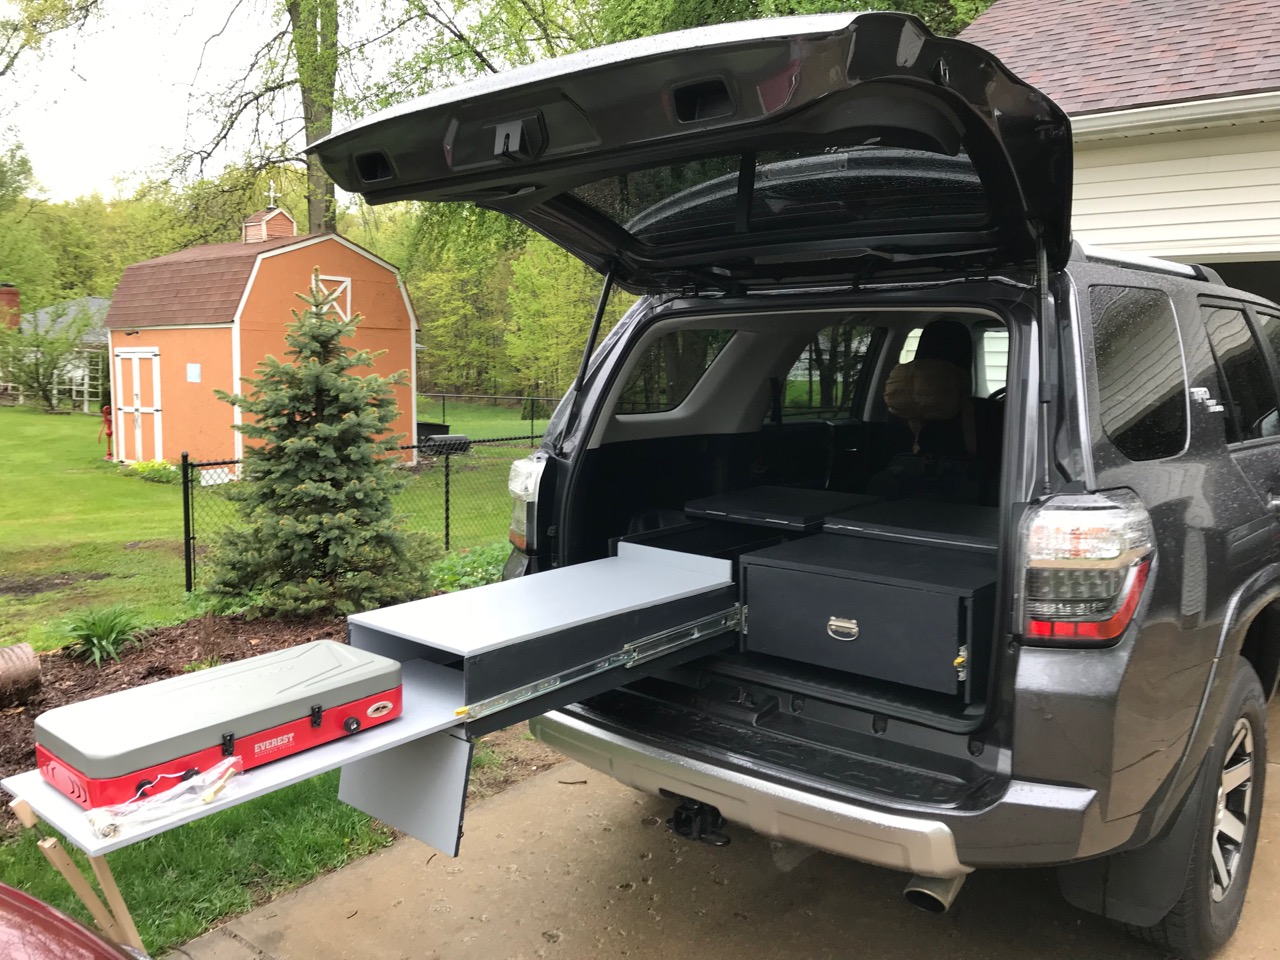
As I have explained before, the left drawer houses a stove that slides out over a removable front panel. The panel flips down on a hinge, as you can see in the picture below, which releases the stove, as you can see in the picture after that. I designed the drawer like this so that I could access the cooler and cook at the same time. Although getting slides strong enough to support that much weight cost a lot of money, I believe the functionality warrants the price. If I had to do this over again, I would try making my own slides by sandwiching aluminum T-slot framing and plastic panel slides. I think this would work almost as well and cost about 90% less.
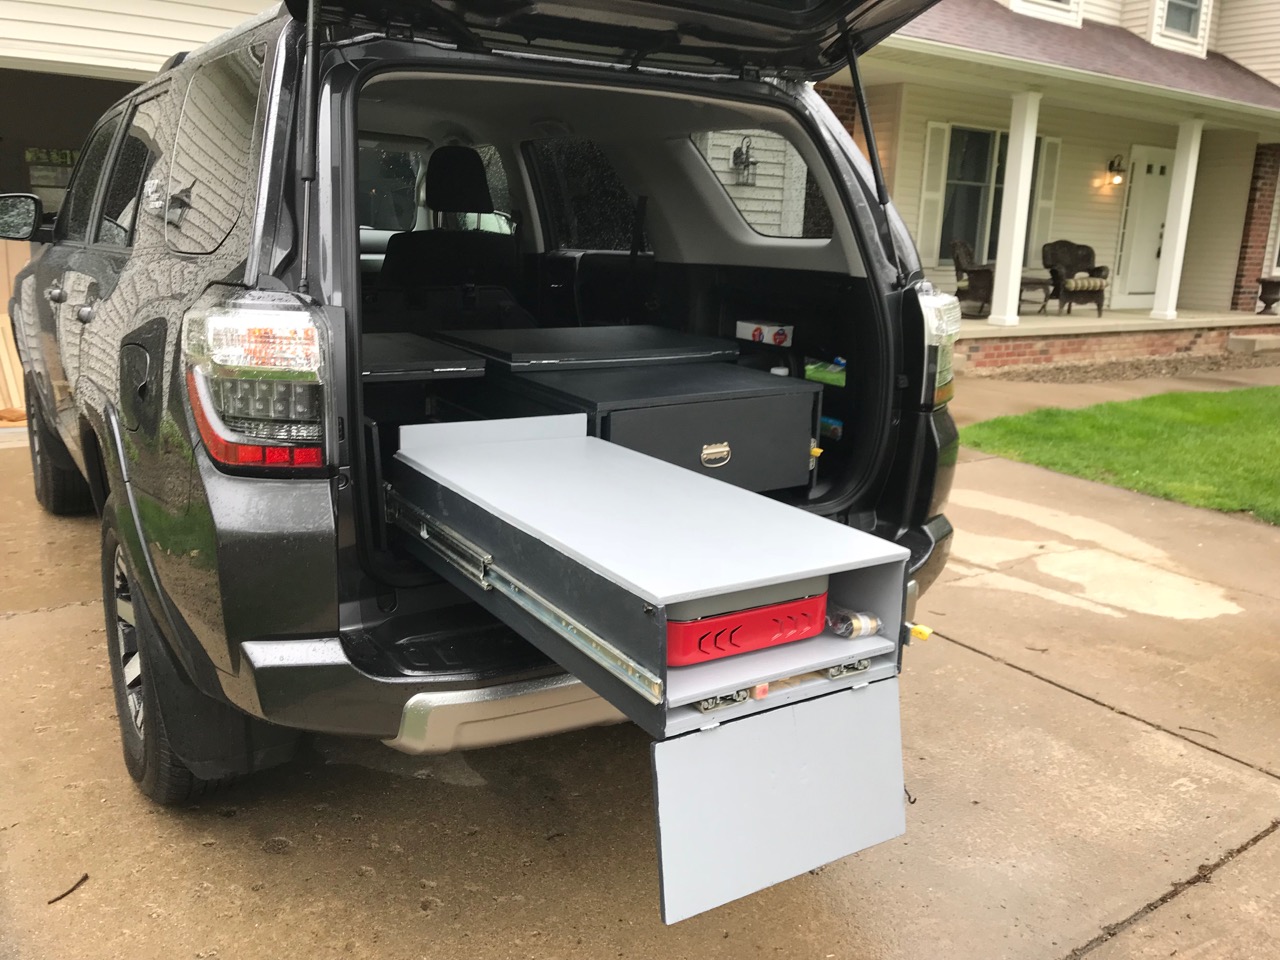
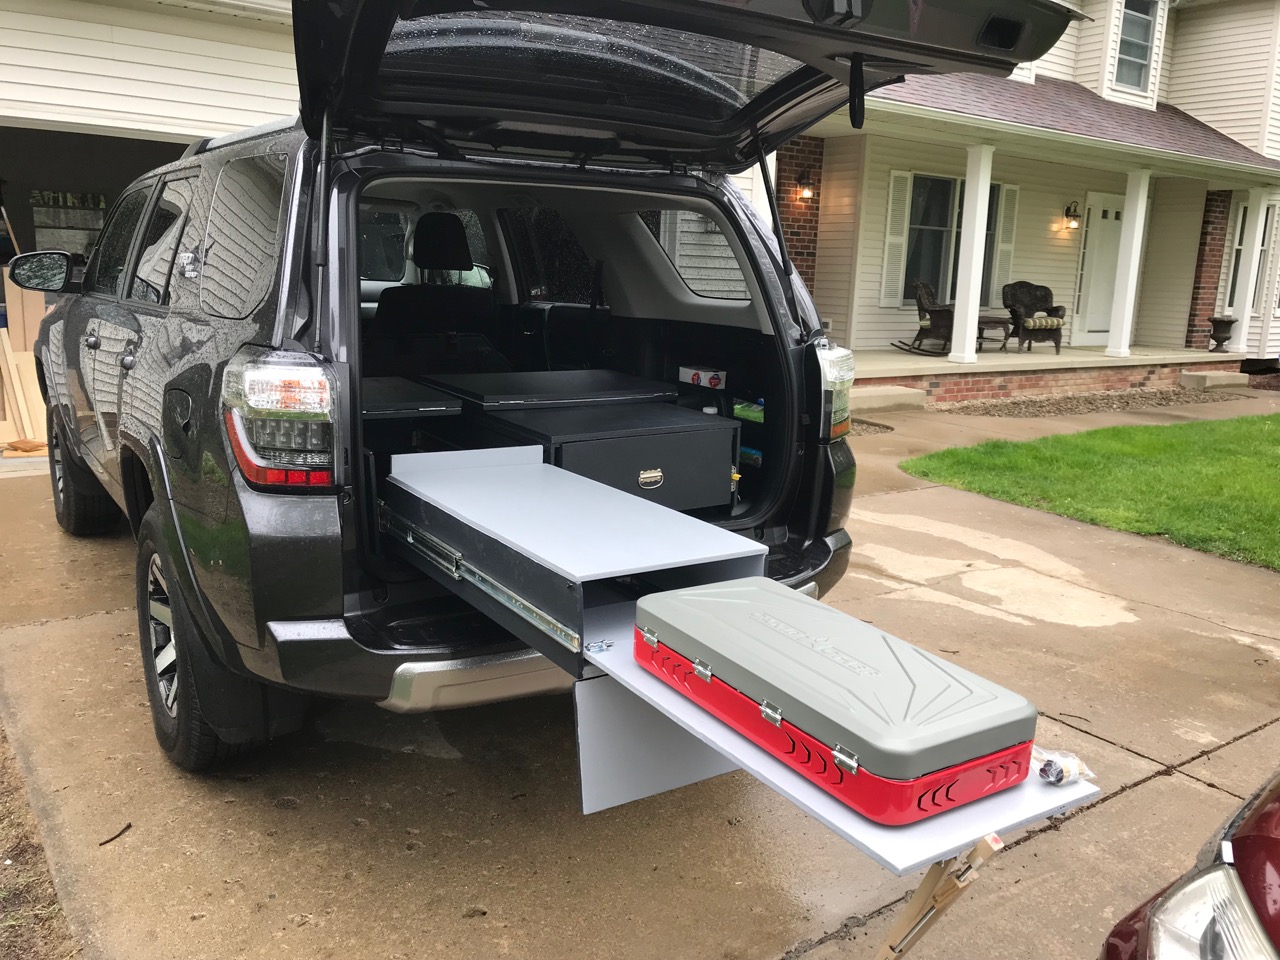
Check out the camp kitchen from another angle in the picture below. The wooden dowel hanging down from the end, an attempt at a stowable support, does a mediocre job at best.
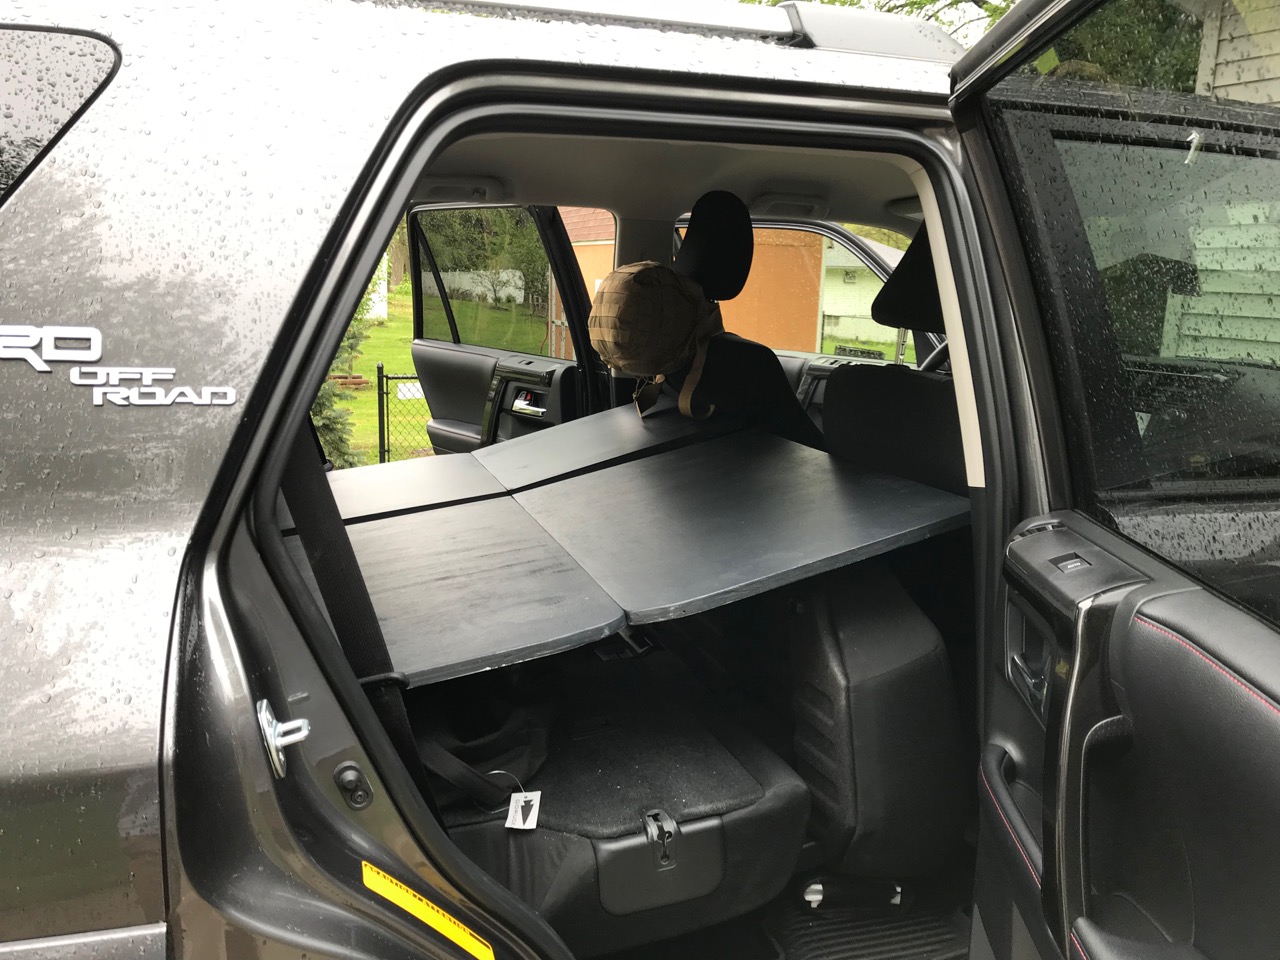
With both seats stowed, I can extend the platform and sleep in my car. See the first picture below. When I don’t have a cooler on the left drawer, I have two small boards that cover the gap and level everything out. Although the incline looks sharp, in the second picture, I have no trouble sleeping there.
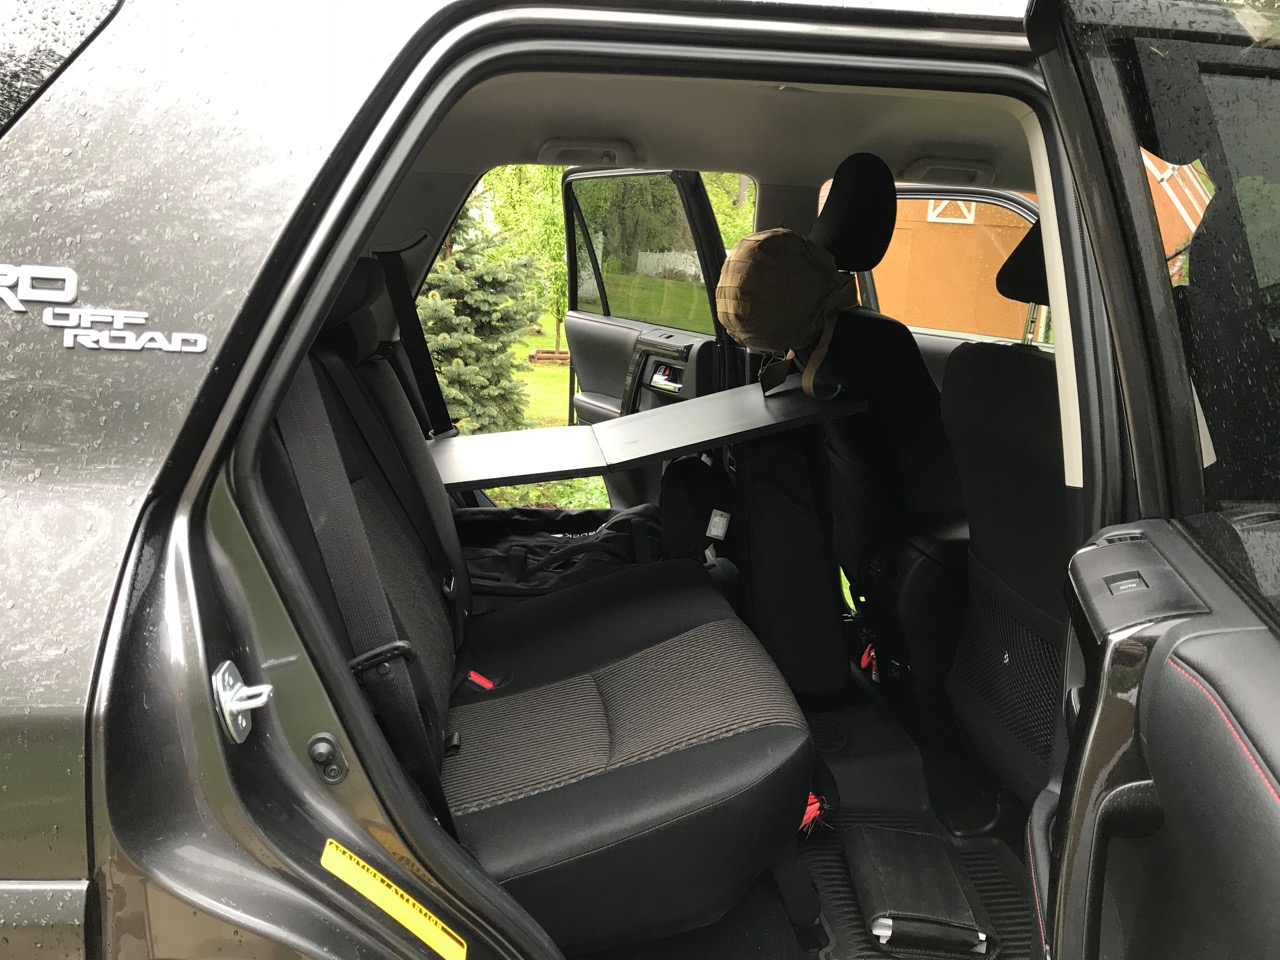
If I have to take passengers, I can stow either platform to access the seat below, or both to get at the entire row. I have the left side down in the first picture below, the right platform down in the second, and both stowed in the third.
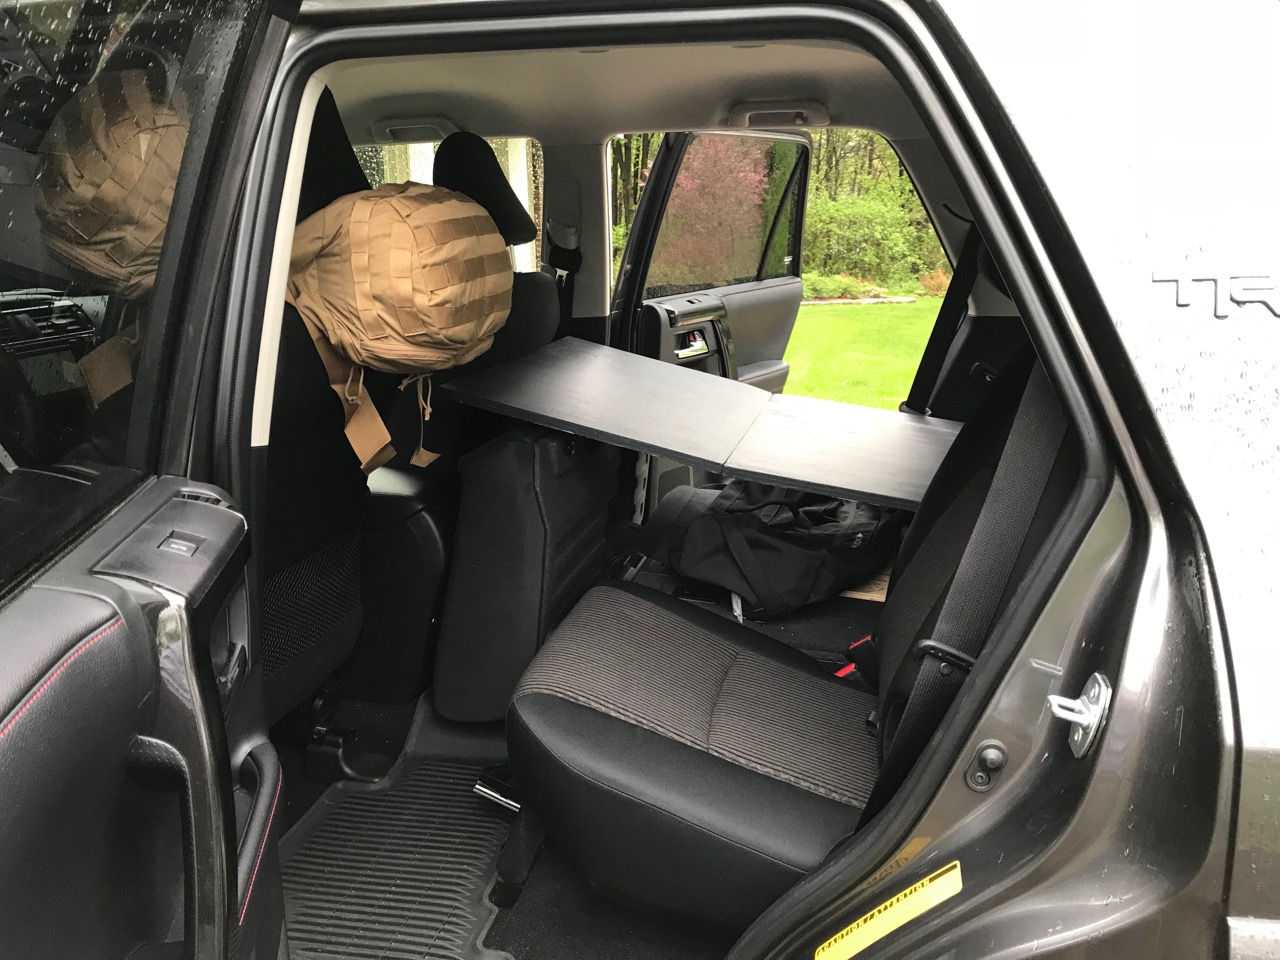
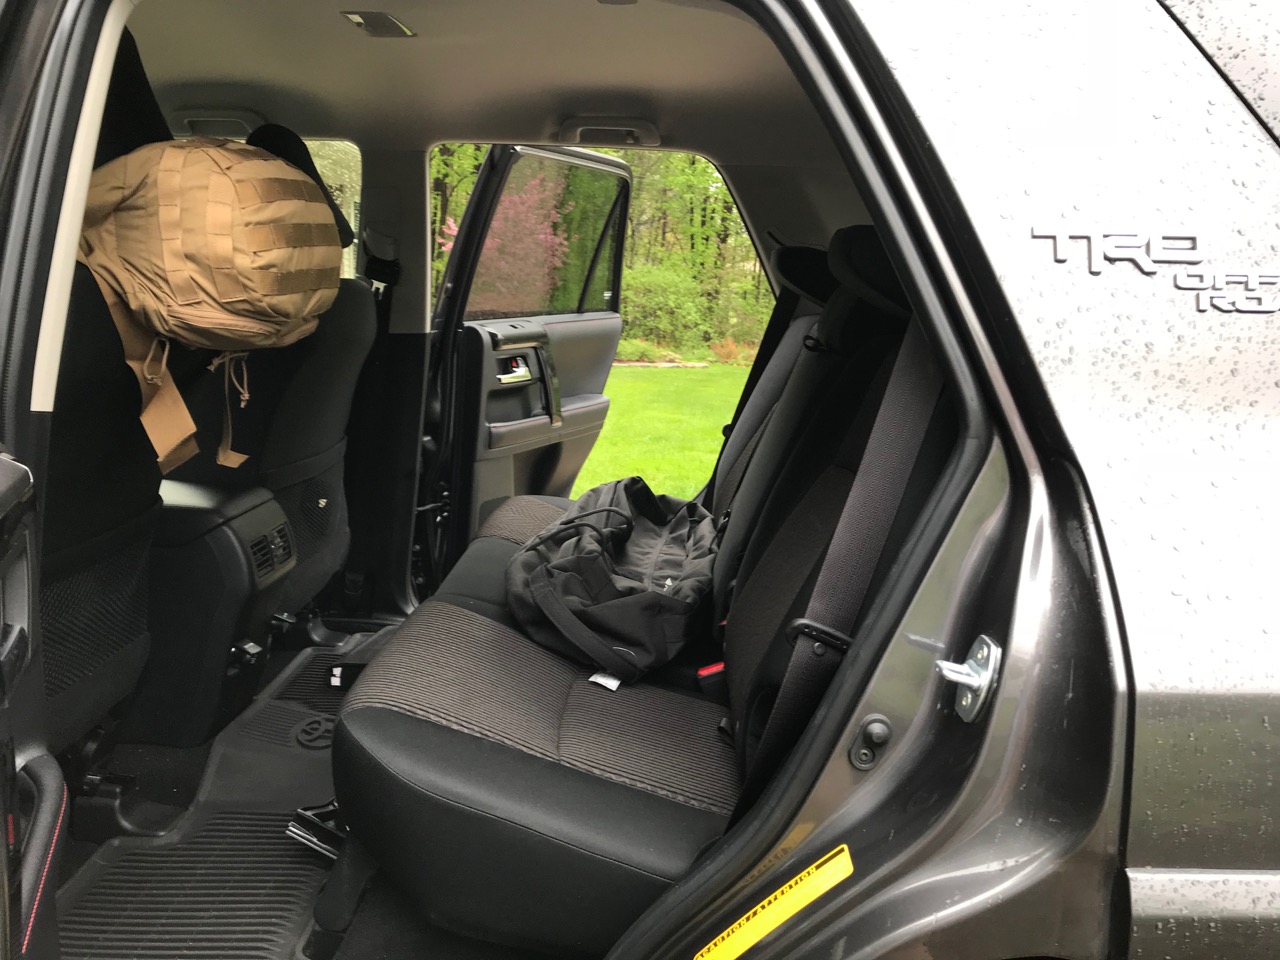
I put a lot of work into designing this system, and took my time during the build. I have yet to run into any problems with it, and I do not foresee encountering any in the future. It gives me lots of storage, a great camp kitchen, and allows me to sleep in my vehicle in a pinch. This system made my 4Runner a viable backcountry adventure platform, and just what I needed for my first big trip.
